Collections is a fantastic experience for you and your site visitors. Featuring your unique content is simple, and the user experience of browsing that content is fast and smooth. Below is a tutorial on how to make the most of your site with the Collections theme.
If you need a hand, email support[at]thethemefoundry[dot]com.
Minimum Requirements
Collections requires WordPress version 3.6 or above.
Introduction to Collections
At its core, Collections is about sharing different types of content. It leverages the post format functionality in WordPress to accomplish this. Collections supports the following post formats, each of which is intended to be used for a distinctive content type:
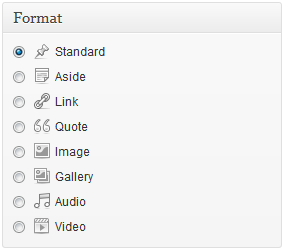
- Standard – A normal blog post. This is the default format when you start a new post.
- Aside – A brief blurb, shorter than a blog post, such as an anecdote or an intriguing thought.
- Link – A URL to somewhere else on the Internet that other people should know about.
- Quote – Someone’s words that are remarkable in some way.
- Image – A single image from your media library or from an image sharing site such as Flickr.
- Gallery – A group of images from your media library.
- Audio – An audio file from your media library or a URL from an audio sharing site (WordPress currently supports SoundCloud, Spotify, and Rdio).
- Video – A video file from your media library or a URL from a video sharing site (Here’s a list of the sites currently supported by WordPress).
Organizing the formats
Each post format represents a “collection”, with two special exceptions:
- “Standard” and “Aside” posts make up one collection called “Articles”.
- “Image” and “Gallery” posts make up one collection called “Photos”.
Each post format and the “collection” it represents has a distinctive visual style in the Collections theme, both when viewing individual posts and when viewing the “collection” archive.
A quick tour of the views in Collections
Homepage
The Homepage is an optional page template that showcases the latest post from each “collection”. Read more on setting up the Homepage below.
See the demo Homepage.
The Stream
The “Stream” view shows your posts in chronological order (newest at the top), regardless of which “collection” it belongs to. It is similar to the standard “posts” view of other WordPress themes. This view acts as the homepage if a static front page has not been set up.
See the demo Stream.
Collection Archive
Each “collection” has an archive view that shows only posts that are using a correlated post format. For example, the Photo Archive shows Image and Gallery posts, and the Video Archive shows Video posts. Each archive has a distinctive visual style.
See examples of each archive view on our demo site.
Single Post
Each post format has its own, distinctive visual style in the single post view.
See examples of each single view on our demo site.
Fast page loading
One of the really unique features of Collections is that it is built to act as a Single Page Application (SPA). This means that a website visitor can navigate through the site and view different content without their web browser ever having to load a new page, making for a fast, fluid user experience.
This feature can be turned off.
pushState, (notably Internet Explorer versions 9 and below), Fast page loading is not available.SVG Images
Several of the image assets used by Collections are in the SVG file format. If these images are not loading correctly on your site, check out this help page.
Creating posts
Where Collections really shines is in how it features the specific type of content that makes each post format special. Some post formats require the content to be entered in a particular way so that Collections can recognize and extract it, others do not. Below are instructions for setting up each post format so that its special content can be featured successfully.
A note about Featured Images
Some of the post formats in Collections use featured images, and some do not. The formats that do use featured images are:
- Image
- Gallery
- Audio
- Video
The following formats do not support featured images, and will not display one even if set:
- Standard
- Aside
- Link
- Quote
Standard and Aside posts
Featured content: the post text.
Standard and Aside posts are created in the normal way: add a title, add some content, and publish! Aside posts are visually different from Standard posts, however: when viewing them individually or in the Articles archive, Aside posts do not display the title, because they are intended to be short, informal blurbs. Note, though, that the title is displayed in Stream view, so it is still important to add one!
Post signature
On Standard posts, a “post signature” is shown at the bottom of the single view. The text in the signature comes from the “Display name publicly as” field in the profile of the author of the post. Here’s how to change it (assuming you are a site administrator):
- Navigate to Users → All Users and click the user you want to edit.
- Choose the desired option from the “Display name publicly as” dropdown, then click Update Profile.
- The options in the dropdown are derived from the “First Name”, “Last Name”, and “Nickname” fields, so if you don’t see the option you want, you’ll need to make some changes in these fields first.
See an example of a Standard and an Aside post.
Link posts
Featured content: a URL.
There are two ways to enter a URL that Collections will recognize:
- Add a plain URL or a hyperlink on the first line of content, by itself.
- Add a hyperlink somewhere within the text. The first hyperlink will be recognized and featured.
The featured URL will be hyperlinked to an icon at the bottom of the single post view.
Link post title
In addition to a URL, Link posts should have a descriptive post title, so that the posts can be differentiated in the Link archive view.
See an example of a Link post.
Quote posts
Featured content: a quote.
There are two parts to a correctly-assembled Quote post: the quote itself, and the quote attribution.
The quote
- Enter the quote text at the beginning of the post, starting on the first line.
The quote attribution
- If you only see one row of buttons in the visual editor, click the Show/Hide Kitchen Sink button to reveal the second row.

- Enter the attribution below the quote, preferably on a line by itself.
- Highlight the attribution and open the Styles dropdown from the second row of buttons. Select Quote Attribution from the dropdown.
Putting it together
- Highlight the quote text and attribution together, and click Blockquote in the first row of buttons.
You can add more content below the quote and attribution, and it will be kept visually separate, as long as it’s not inside the blockquote.
Quote post title
In addition to a quote, Quote posts should have a descriptive post title, so that the posts can be differentiated in the Quote archive view.
See an example of a Quote post.
Image posts
Featured content: a single image.
There are several ways to include an image that Collections will recognize and feature:
- Set a featured image.
- Add a plain URL or a hyperlink to the image on the first line of content, by itself. This is the option to use for adding an image from an external source like Flickr.
- Insert an image into the first line of the post using the Add Media button.
- Simply attach an image to the post.
Any images inserted into the content below the first line will remain in place and behave as in a normal post (including displaying captions).
See an example of an Image post.
Gallery posts
Featured content: a series of images.
There are two ways to include a gallery that Collections will recognize and feature:
- Insert a gallery into the first line of the post using the Add Media button.
- Simply attach images to the post. All images attached to the post will be included in the gallery.
Any galleries inserted into the content below the first line will remain in place and behave as in a normal post.
Gallery cover image
In the Photo archive view, a gallery post is represented by a “cover” image. This image comes from either the post’s featured image, or the first image attached to the post.
See an example of a Gallery post.
Audio posts
Featured content: an audio clip.
There are three ways to include an audio clip that Collections will recognize and feature:
- Add a plain URL or a hyperlink to the audio clip on the first line of content, by itself. This is the option to use for adding an audio clip from an external source like SoundCloud.
- Insert an audio clip into the first line of the post using the Add Media button.
- Simply attach an audio file to the post.
Any audio clips inserted into the content below the first line will remain in place and behave as in a normal post.
Audio metadata
In the case that the featured audio clip has been uploaded to the media library, WordPress will extract any embedded metadata in the audio file (eg. from the ID3 tag in an MP3), including the song title, artist, and the album art. The song title will be displayed in lieu of the post title, and the album art will appear instead of the post’s featured image.
For audio clips that don’t have embedded album art, the album cover will use the post’s featured image, if available.
See an example of an Audio post.
Video posts
Featured content: a video.
There are three ways to include a video that Collections will recognize and feature:
- Add a plain URL or a hyperlink to the video on the first line of content, by itself. This is the option to use for adding a video from an external source like YouTube or Vimeo.
- Insert a video into the first line of the post using the Add Media button.
- Simply attach a video file to the post.
.mov format for video files. Adding a .mov file to a Video post will result in the generation of a link that a reader can use to download the file.Any videos inserted into the content below the first line will remain in place and behave as in a normal post.
Video cover image
In the Video archive view, a video post is represented by a “cover” image. This image comes from the post’s featured image.
See an example of a Video post.
Handling media files
Since the Image, Gallery, Audio, and Video post formats in Collections all utilize features from the WordPress Media Library, it’s important to have a good understanding of this functionality. Here are two good video tutorials on the subject:
Attaching files to posts
Any time a file is uploaded to WordPress while creating or editing a post, it becomes “attached” to that post, regardless of whether that file is actually “inserted” into the content. Collections looks for these attached files in Image, Gallery, Audio, and Video posts as one of the ways to determine the special content to feature.
To attach a file to a post:
- Click the Add Media button above the content editor.
- Under the “Insert Media” heading, choose the “Upload Files” link.
- Upload the file as instructed on the screen.
- Once the upload is complete, you may close the Media screen by clicking the “X” in the upper right corner. There is no need to insert it into the content.
Collections will select these attachments in the order they were uploaded, starting with the oldest. To change the order:
- Click the Add Media button above the content editor.
- Under the “Insert Media” heading, choose the “Media Library” link.
- Below that is a dropdown showing “All media items”. Click this and select “Uploaded to this post”.
- Drag and drop the attachments into the desired order. The one farthest to the left will be the first one selected.
Image sizes
For reference, these are the image sizes used in Collections:
Homepage section background
- Width: 756px
- Height: 470px
(these are the minimum recommended dimensions for Video featured images)
Image and Gallery single view
- Width: 780px (this is the minimum recommended width for Image and Gallery images)
- Height: variable
Image archive view
- Width: 252px
- Height: 252px
Gallery archive view
- Width: 504px
- Height: variable
Audio album cover (single and archive view)
- Width: 450px
- Height: 450px
(these are the minimum recommended dimensions for Audio featured images)
Video archive view
- Width: 378px
- Height: 235px
(note that the minimum recommended dimensions for this image are larger than this and are listed above in the Homepage section background)
Customizing Collections
Collections offers the ability to customize certain parts of the theme through the Theme Customizer. Changing these options is the easiest way to alter the theme. While you cannot customize every part of the theme with the customizer, the important optional features in Collections have been made available in the Theme Customizer.
Setting up the Homepage
By default, Collections uses the Stream view as the homepage. However, you can also use the special Homepage Template by setting up a static front page:
- Under Pages, select Add New to create a new page, or select All Pages to pick one that has already been created.
- Give the page a title, such as “Home”. Other content that you add will appear in the About Section.
- In the Page Attributes box on the right side of the screen, click the “Template” dropdown and select “Homepage Template”.
- Click Publish (or Update).
- Now, navigate to Appearance → Customize.
- Click the Static Front Page section, and choose “A static page” under “Front page displays”.
- Choose the page you just set up from the “Front page” dropdown. You can choose another page from the “Posts page” dropdown that will be the Stream view.
- Click Save & Publish.
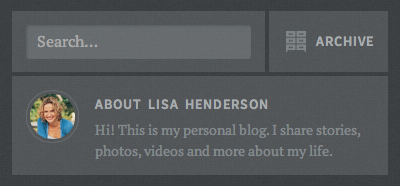
Customizing the Homepage About section
The Homepage Template includes an About section at the bottom. It has a search box, a link to the Stream view, and a place to add a welcome message or other content. Next to this content you can include a small avatar image that is styled the same way as the comment section avatars:
Add a welcome message
- Edit the page that has been set up as the homepage.
- Enter your desired content into the WordPress content editor.
Add an avatar
- Edit the page that has been set up as the homepage.
- Set a featured image.
Disabling the Homepage About section
- Navigate to Appearance → Customize.
- Click the Display section, and check the box next to “Hide the Homepage About section”. The About section should disappear in the preview pane to the right.
- Click Save & Publish.
Disabling Fast page loading
- Navigate to Appearance → Customize.
- Click the Display section, and check the box next to “Disable Fast page loading”.
- Click Save & Publish.
Footer text
Collections allows for the addition of arbitrary text in the footer of the theme:
- Navigate to Appearance → Customize.
- Click the Footer section.
- In the Footer Text input, enter the desired content.
- A preview of the footer text will be displayed in the right hand side of the page.
- Click Save & Publish.
Social profile links
Social profile links for Twitter, Facebook, Google Plus, Flickr, Pinterest, LinkedIn, and RSS can be added to your site’s footer. The social links look like the image below:
![]()
To add a social profile link, follow these steps:
- Navigate to Appearance → Customize.
- Click the Footer section.
- Enter the full URL of the social profile into the relevant text box.
- A preview of the link will be displayed in the right hand side of the page.
- Click Save & Publish.
Styles
Collections offers three custom styles that a user can add to post content. The styles are implemented via the Styles dropdown in the second row of buttons in WordPress editor. To reveal the second row, click Show/Hide Kitchen Sink in the first row.
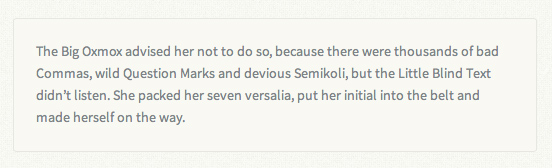
Note
Note is a block-level style, meaning it will create a separate block of styled content from whatever text it is applied to.
To add the Note style, follow these instructions:
- Reveal the second row of editor buttons if it is hidden.
- Highlight a full paragraph of text.
- Click the Styles dropdown and select “Note”.
Quote Attribution
Quote Attribution is an inline style, meaning it will apply special styling to the specific letters you select, but won’t change the layout. This style has special meaning in the Quote post format.
To add the Quote Attribution style, follow these instructions:
- Reveal the second row of editor buttons if it is hidden.
- Highlight the name that you want to attribute to a quote.
- Click the Styles dropdown and select “Quote Attribution”.
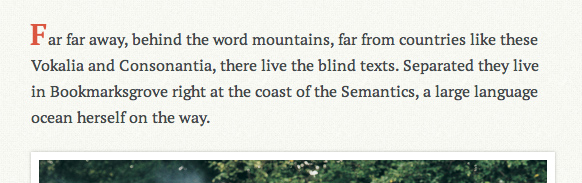
Raised Cap
Raised Cap is an inline style that adds a stylized first letter to a paragraph. It is recommended that this styling is only ever used for the first letter in a post or page. Overuse of this styling in a single page of content can be confusing to the reader.
To add the Raised Cap style, follow these instructions:
- Reveal the second row of editor buttons if it is hidden.
- Highlight a single character in a paragraph of text.
- Click the Styles dropdown and select “Quote Attribution”.
Advanced filters
Collections offers WordPress filters for changing theme behavior with code snippets. Using filters is the most difficult way to alter the theme and should only be done if you are comfortable working with PHP. These filters and the sample code should be placed in your child theme’s functions.php file. While placing these filters in your parent theme’s functions.php will work, the customization will be removed when you update the theme. Read more about setting up your child theme in our customization tutorial.
collections_audio_shortcodes, collections_video_shortcodes, & collections_gallery_shortcodes
These three filters allow a developer to register new shortcodes as being compatible with the “featured content” in Collections. For example, if a plugin is installed that enables the shortcode [new_slider] for a different gallery slider script, a developer could add something like the following:
function my_collections_gallery_shortcodes( $shortcodes ) {
    $shortcodes[] = 'new_slider';
    return $shortcodes;
}
add_filter( 'collections_gallery_shortcodes', 'my_collections_gallery_shortcodes' );
Then, when creating a new Gallery post, the post author could insert [new_slider] in the first line of content, and Collections would recognize and feature it.
collections_responsive_slides_options
The collections_responsive_slides_options filter allows a developer to change the options that control the slider on the homepage template. For instance, a developer can change the speed of the animated transition between slides to 2 seconds.
function my_collections_responsive_slides_options( $options, $post_id ) {
    $options['speed'] = 2000;
    return $options;
}
add_filter( 'collections_responsive_slides_options', 'my_collections_responsive_slides_options', 10, 2 );
For more Responsive Slides options, see the Responsive Slides documentation.
collections_get_social_links
The collections_get_social_links filter allows you to add, remove, reorder, or edit social icon links in the site footer. For instance, to add a link for Instagram, use the code below in your child theme.
In functions.php:
function my_collections_get_social_links( $services ) {
    $services['instagram'] = array(
        'title' => 'Instagram',
        'url'   => 'http://path.com/to/instagram-profile'
    );
    return $services;
}
add_filter( 'collections_get_social_links', 'my_collections_get_social_links' );
In style.css:
.icons li a.instagram {
    width: 18px;
    background: url(http://path/to/icon/image) no-repeat;
    background-size: 18px 18px;
}